
Advertisement
It always amazes me how so few bowhunters regularly maintain their bows. If you expect your compound to perform flawlessly and last for years, after all, it needs some occasional TLC. And we’re not talking rocket science here, especially if you have a bow press—a device that lets you compress the limbs so you can do your own repairs and tuning, or install a new string, cable or peep sight. To keep your bow in top shooting shape, follow this simple routine.
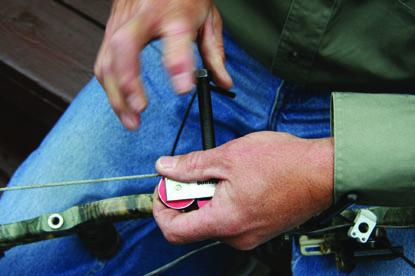
1. In order to keep your bow shooting exactly as it did before servicing it, you need to take some measurements and write them down. Measure the distance between the string and upper and lower limb pockets and the distance from your peep and nock point to both axles. These simple measurements will keep you in the ballpark when it comes time to reassemble and tune your bow.
Advertisement
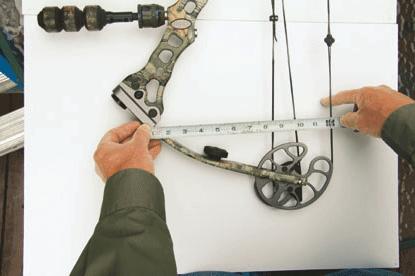 Simple measurements will help when it’s time to reassemble and tune your bow.
2. Thoroughly inspect your bow limbs, string and cable for signs of wear. If you find stress cracks or delamination on the limbs, take your bow to a pro shop. If your string and cable are overly worn, replace them. Go with a custom string set, which is usually far superior to the manufacturer’s offering. On average, I replace my string every two years. Korbin’s, Winner’s Choice, Ballistic and Scorpion are some of the top brands.
3. Carefully following the instructions for your bow press, install the device on your bow. While I have a mounted bow press in my workshop, I often use my portable, easy-to-use Bowmaster press, since it’s what I bring to camp or into the field.
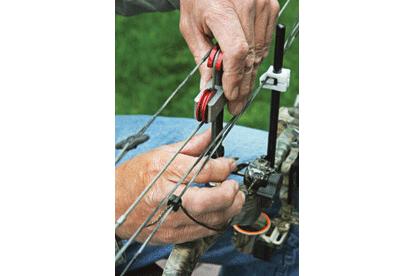 When removing parts, it’s a good idea to take photos for later.
4. Crank the handle of the press until the string and cable are slack enough to remove from the cams, or cam and idler wheel. Before removing them, take a photo of the configuration as a reference when reassembling the bow. Once you remove the string and cable, loosen the press until the limbs become totally slack (record the number of turns of the press handle it takes to totally relax the limbs). Next, remove the limbs from the limb pockets using an Allen key, and set the bow riser to the side.
Advertisement
5. Remove one C-clip from the axle on the cam and carefully slide out the axle (I find it best to place all the parts on a white towel so they’re easy to find later). Once you’ve removed the axle, roll it on a flat surface to ensure it’s not bent; if it is, order a new set. And if there’s any rust, sand it off with a fine emery cloth. Then repeat the process with the idler wheel (or the second cam on a twin cam bow).
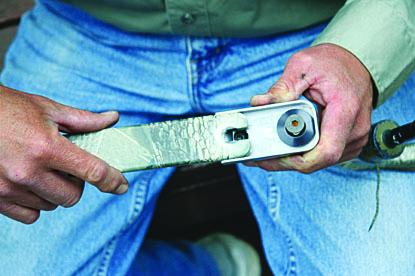
 Remove dirt and old lubricant—the most common causes of squeaks and creaks.
6. Using rubbing alcohol and a clean rag, paper towel or cotton swabs, carefully wipe down the axles and limb pockets to remove dirt and old lubricant, which are the most common causes of squeaks and creaks a bow makes when drawn. Then apply a light coating of high-grade white lithium grease—a little goes a long way—to the limb pockets and axles.
 When reassembling, make sure everything is properly aligned.
7. Now it’s time to reassemble your bow. First, align the cams/idler wheel into the limbs, insert the axles and attach the C-clips to secure the axles in place. Next, insert the limbs into each limb pocket, making sure they’re completely seated.
 Check the string and cable to make sure they’re properly seated.
8. Reattach the bow press to the limb tips and start compressing the limbs. Once you’ve turned the press handle the same number of turns you recorded in step 4, you should be able to place the string and cable back on the cams/idler wheel; make sure they’re attached on the appropriate posts and in the tracks. Keep some tension on the string as you slowly relax the press, then carefully examine the string and cable to be sure they’re properly seated.
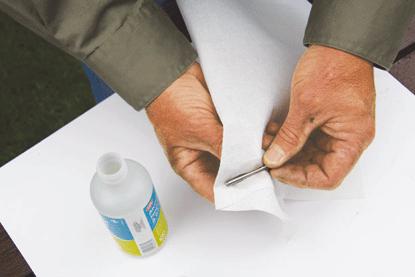
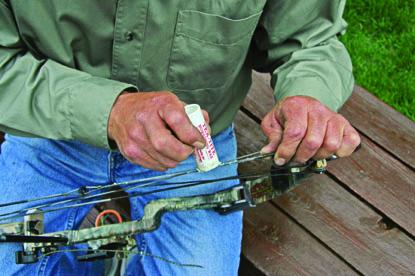 Apply string wax liberally.
9. Liberally apply quality string wax to the string and cable, rubbing it in using a small patch of leather—the friction will cause the wax to melt and penetrate the strands.
And there you have it: a full maintenance plan to get your bow ready for the fall. Be safe, and shoot straight.