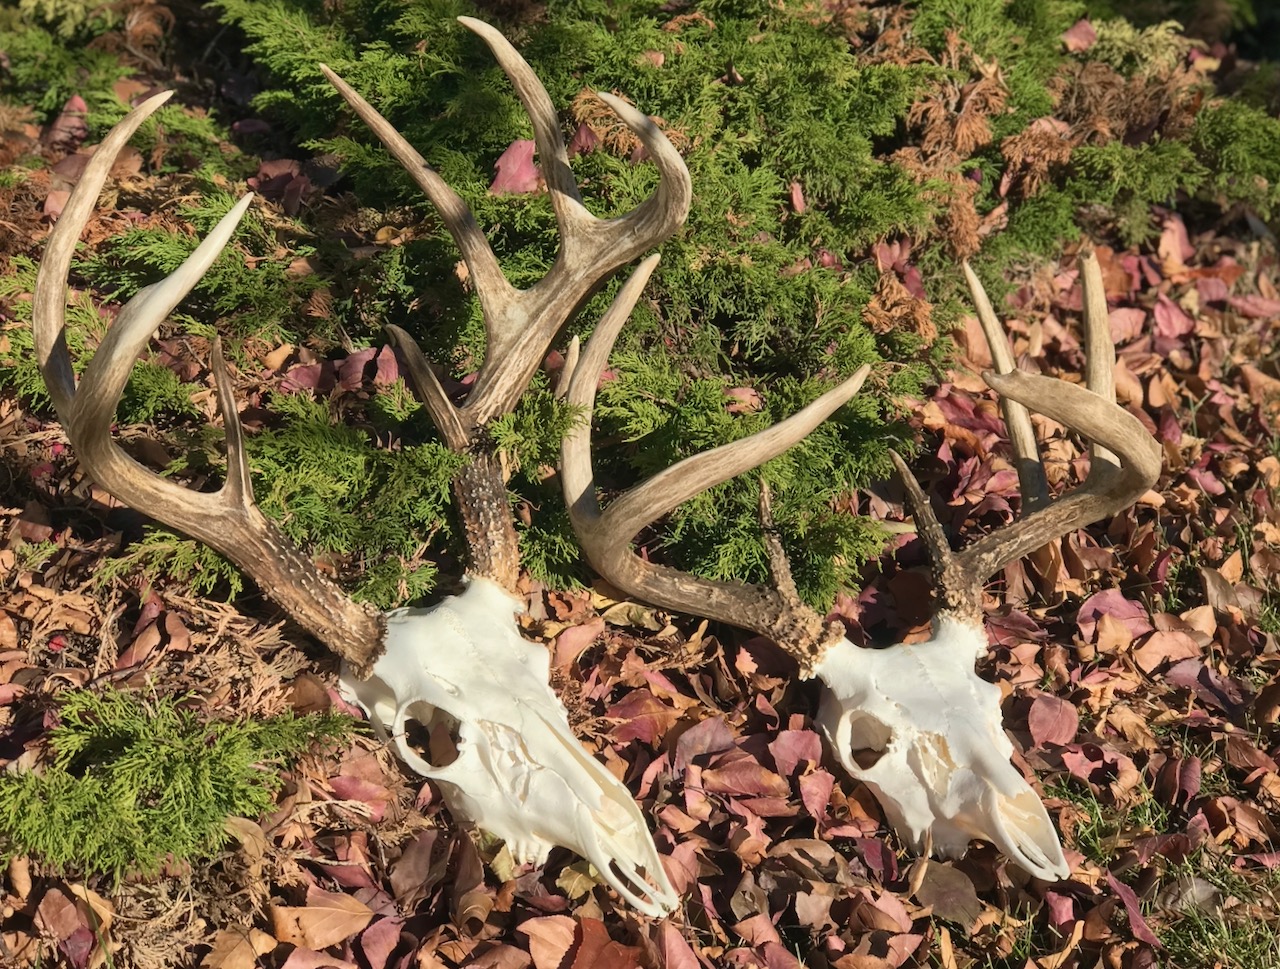
A different kind of trophy
To honour the memory of your next big-game hunt, create your own European mount with these five easy steps
Advertisement
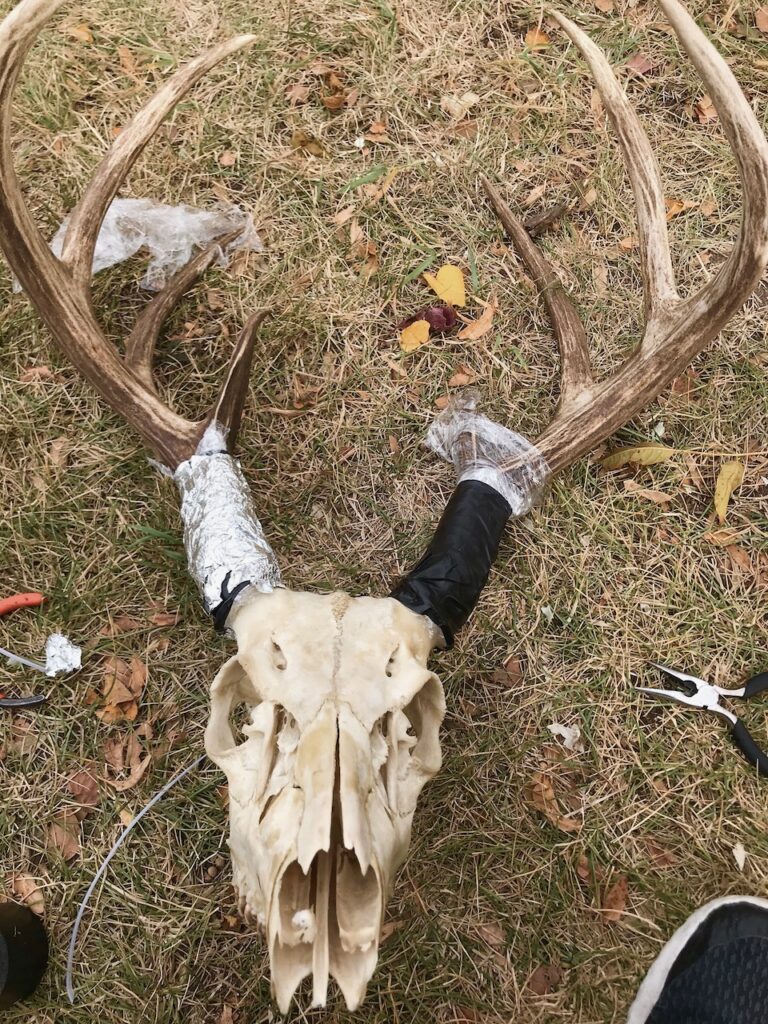 It’s important to bleach with the correct type of hydrogen peroxide
STEP 4: BLEACHING
To bleach the skull white, using the right hydrogen peroxide (HP) is important. You want the strongest legal level you can buy in Canada, which is 29 per cent purity. Short of shipping it in from out of the country, the only place you can buy this level of concentration is from a hydroponics store. I recommend shopping around for the best price. I usually buy eight litres at a time for approximately $80.
Before submerging the skull in the HP, you first need to protect the antlers to avoid bleaching them. I find the best way to do this is to wrap them with six inches of plastic wrap, starting at the base. I then tightly wrap duct tape around the plastic wrap to further prevent HP from bleaching the antlers. Be mindful that HP is strong and potent, and it will turn your skin white on contact. If that happens, simply wash it off right away and the whiteness will fade in short order.
Advertisement
Next, pour the HP into a bucket that’s big enough to completely submerge the skull. On average, I soak my skulls for one to two hours, checking periodically until I have achieved the desired whiteness (also remember to include any skull pieces that detached during the boiling process). The strength of the HP goes down after the bleaching process, so I prefer to use a fresh batch each time.
Once the bleaching is complete and the skull is dry, it’s time to reattach any loose pieces, such as nasal cavity bones. For that, use an arts and crafts glue gun. It works perfectly to bond the bones, and the glue dries clear.